Teaching Music Online - A Basic Guide
With the recent spread of COVID-19, many teachers are making the shift to teaching online. For many long time teachers, this transition will pose challenges, but it can also create opportunities for a well prepared, and savvy music teacher.
Let's be clear; online lessons will not be the same. Duets or physical adjustments your student's posture and technique are impossible. Managing backing tracks can also present challenges. Depending on the quality of your internet connection, you may also find yourself having to repeat yourself more than usual. Your student's hardware and internet connection matter too - A poor internet connection, or audio hardware on their end can make it hard to interface with you.
If you're intimidated by the prospect of teaching an instrument online, don't fret! You're not the first to do this, and many of the biggest challenges have simple solutions. This article contains all of the information you need to get started teaching piano, violin, guitar or any other instrument online.
Let's get Started!
You Will Need:
- A device to capture the video and audio.
- Internet connection
- Video conference software (we recommend Zoom)
Setting Up a Space

Just like your physical teaching space, your online teaching space is important in projecting a sense of professionalism and competence to your students. Small details like lighting can be the difference between your students having a stimulating lesson, and disengaging from their lessons entirely.
Your Space Must:
- Be well lit enough to see fine detail
- Contain your instrument (obviously)
- Be closed off from potential distractions
- Have a fast, stable internet connection
If possible, we'd recommend using your existing teaching space. It should fulfil all of the above requirements, and help maintain a sense of consistency for your students.
Ideally, your student should set up similarly. It should be noted at this point that this is a great chance for you to see the space your student practices in. Is there something about that environment that could be changed to improve the quality of their practice?
Ultimately, what both you and your student need is an environment in which you can see and hear each other clearly (remember to test this with your camera), and are free from distractions. If you have this covered, a few hiccups in your internet connection aren't going to substantially impact the quality of the lesson.
Choosing Your Device
Use what you have! Any device with a high quality camera, and capable of connecting to the internet will work just fine. Each have their own pros and cons, and you may even find yourself switching devices between, or even during lessons depending on your student's needs.
QUICK TIP: To check your internet speed visit www.fast.com. You should be getting at least 25 megabytes per second for successful video conferencing.
Smartphone
|
Pro
|
Con
|
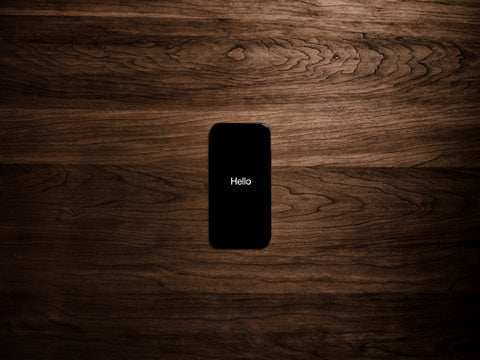
The good thing about using your phone is that it’s easy to move around and find the right angle to set up for your lesson. Sound quality is usually adequate, and potentially even high quality on a newer phone.
However, a small screen can make technical advice difficult. It can be very hard to pick out fine detail of your student's technique on a device that makes their hands look smaller than they are. Phones are also distracting. Even in a face to face lessons this can be a problem, but teaching online it's a potentially impossible hurdle to cross.
For these reasons, unless you have no other suitable device, I would not recommend using your phone.
I-pad/Tablet

|
Pro
|
Con
|
Using a tablet device has several distinct advantages over a phone. Like a phone, it is a portable device which can easily be placed on a music stand next to your piano. A larger screen allows for lessons that address technique, and a better built in speaker will improve the quality of your audio if you aren't using a headset. In general terms, this means you and your students should be able to see and hear each other better.
Tablet devices is my favourite device to use for teaching online, because it gives me the video and audio quality of a laptop, and the portability of a phone. I can easily pick my tablet up and move it closer to my hands or sheet music to clarify a difficult passage or technique without having to worry about whether I can see or hear my students.
Laptop
|
Pro
|
Con
|
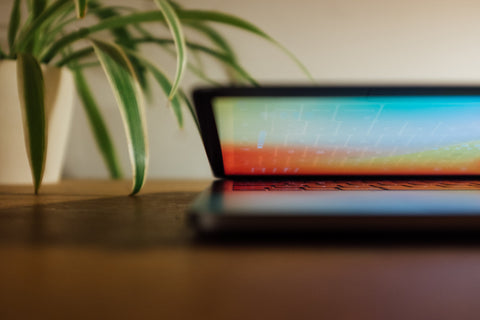
Laptops are probably the easiest device to achieve an optimal angle by tilting the screen forwards or backwards. Your screen size is ideal, the sound quality should be reasonable and if not, you can always plug in external speakers or a USB microphone like this one to enhance the lesson experience.
You can improvise when it comes to a stand. Most teachers will have either a tall chair, bench or particularly sturdy music stand that will suit fine. If you are a piano teacher, you can even place it on top of your piano! If you prefer to get something a little more stable, you could purchase a laptop tripod stand.
While the quality of most laptop webcams is inferior to the camera on your phone and tablet, as long as your laptop isn't more than 10 years old, it should be up to the task. If you find your video is too grainy, HD webcams are available for as little as $58 from officeworks.
The only real downside of a laptop is that it's bulk makes moving it around during the lesson a lot harder. If you are teaching an instrument like violin that may require a number of different angles, this probably isn't right for you, but or most people, the additional flexibility offered by external devices will more than make up for this.
Desktop Computer
|
Pro
|
Con
|
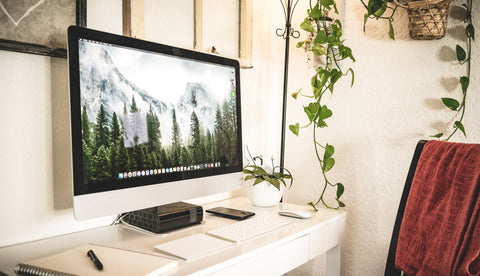
Desktop computers are going to be the most challenging to move around to achieve that ideal angle and it will take some serious improvising to get the desktop where you want it.
Your computer should have a built-in webcam, however, if not, you will need to source an external one. You may find this easier in any case, as a long USB cable will allow you to move your camera around more freely during the lesson.
Your computer may or may not have a built in microphone. If it doesn't, we'd suggest now is a good time to invest in an audio interface, which will allow you to broadcast studio quality audio to your students.
A laptop is going to be a better option than a desktop in most cases. It offer the same advantages, as well as some of the portability of a phone or tablet. I'd only recommend using a desktop if you are using a home recording studio as your teaching space, and already have the equipment required to make this work well.
Choosing Your Conferencing Platform
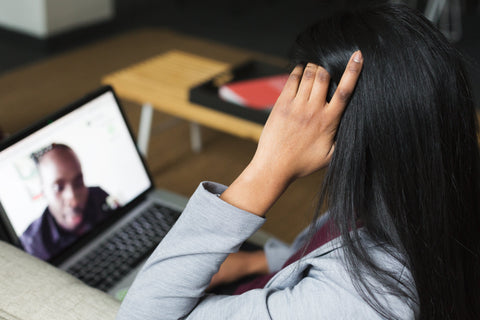
There is an almost overwhelming number of platforms that will allow you to video conference with your students. The three most popular are Zoom, Skype and FaceTime. On paper, they're more or less the same although in practise there are some clear differences, and one platform that stands above the others for teaching music online.
As with devices, we suggest you use what you're most comfortable with because it will reduce "dead air time" as a consequence of you learning new platform as you teach.
Remember, you and your students have to be using the same platform for this to work!
Zoom
Zoom is the best reviewed video conferencing platform available right now. In addition to great quality audio, and the most stable video we've seen from a conferencing platform, it boats a host of high profile corporate endorsements and a low-latency "music mode" that automatically optimises your settings for teaching music.
Additionally, it has great features for recording and transcribing the lessons that will allow your students to review lesson material more easily, or even re-watch the examples you gave them.
Skype
Skype is such a giant, the name has has become a generic word for video conferencing. Most parents and teachers already have Skype on their devices. Very simple and user-friendly, it is one of the oldest and most reliable video conferencing platforms.
While using Skype may not be an issue for most, It's popularity, and the relative bulkiness of the software are more likely to result in call dropouts, skipped frames and audio latency than Zoom.
FaceTime
If you, and all of your students have access to Apple devices, FaceTime might be a good option for you. Face-time comes pre-installed on all iOS devices, and is extremely easy to use. While the video quality is good, the audio compression algorithm may make lessons dealing with dynamics a challenge.
Much like Skype, it's popularity makes it more prone to unexpected call dropouts during peak call times.
QUICK TIP: Keep your device plugged in during lessons to ensure you don't run out of battery when you have students back to back.
ANGLES
The viewing angle is a critical element of your lesson. Positioning the camera too high or low can prevent full visibility of the hands, limiting your capacity to deal with technique in video lessons. The optimal angle will vary from instrument to instrument and lesson to lesson. String, brass and wind players have the luxury of being able to position themselves around the camera, moving closer or further away as needed.
Piano teachers unfortunately don't have this luxury, but there is a tried and tested ways of keeping your face and hands in the shot.
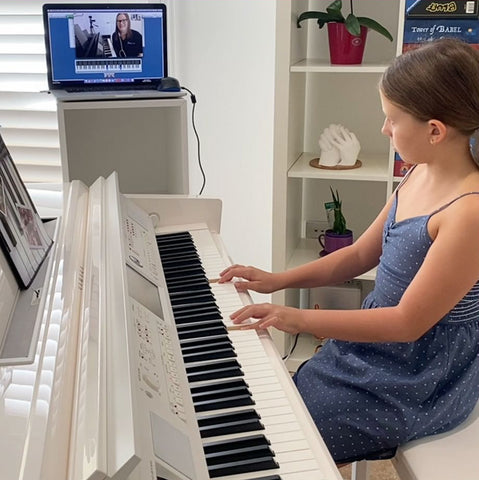
DO Try to keep the camera elevated above the keyboard. Start at 90 degrees to the instrument, and adjust as needed. A small bookshelf or will work well for this, or if you prefer something a little more stable, you can purchase an adjustable laptop stand which should enable you to find the perfect angle easily.
DO NOT place the camera level with your hands, because your students will only be able to see one hand at a time, and talking to someone's hands instead of face is a little awkward for everyone concerned.
A small bookshelf or will work well for this, or if you prefer something a little more stable, you can purchase an adjustable laptop stand which should enable you to find the perfect angle easily.
In a more advanced setting, the teacher can set up multiple angles, not just from the right-hand side, but an overhead angle and closeups from the sheet music, particularly when required to write in fingering, annotate expressions or notes- just like you would in person. Using a portable device like a phone or tablet makes this easier if you don't have a multi-camera setup, but it can also be achieved through the use of a USB webcam.
In either case, you may find it useful to mark the places you want to place your camera with tape, to ensure that your shots are consistent.
QUICK TIP: Schedule a student lesson reminder! Send a friendly reminder message to your students the day before the lesson, that way your students can be well prepared for the lesson and things can run a lot more smoothly.
Alternatives to Real-Time Lessons
IF you or your students have a poor internet connection, or lack the necessary hardware to conduct a lesson via video conference, a great alternative to real-time lessons is to pre-record instructional videos for your students. Some students and parents may find this is simply easier, and more convenient.
Be flexible and empathetic to the home situation of students - some may not have available adult supervision or reliable internet. If students need special support, be open to accommodate their unique needs.
Do you have feedback, or questions about this article? email irene@loganspianos.com.au
